

Building a Flow
A Flow is a training path: a set of courses your volunteers take in order. You assign the Flow once, and each person works through it at their own pace. When they finish, EquipEngine can issue a certificate and let their ministry lead know.
Use a Flow for anything with more than one step, such as new volunteer onboarding, a serve-team certification, or a leadership track.
Create a Flow
- Go to Flows in the sidebar and click New Flow.
- Give it a name (for example, "New Volunteer Onboarding") and click Create Flow.
- You'll land on the Flow's Outline tab, where you build it.
Canvas or List
The Outline has two views. Switch between them with the List / Canvas toggle at the top. EquipEngine remembers your choice.
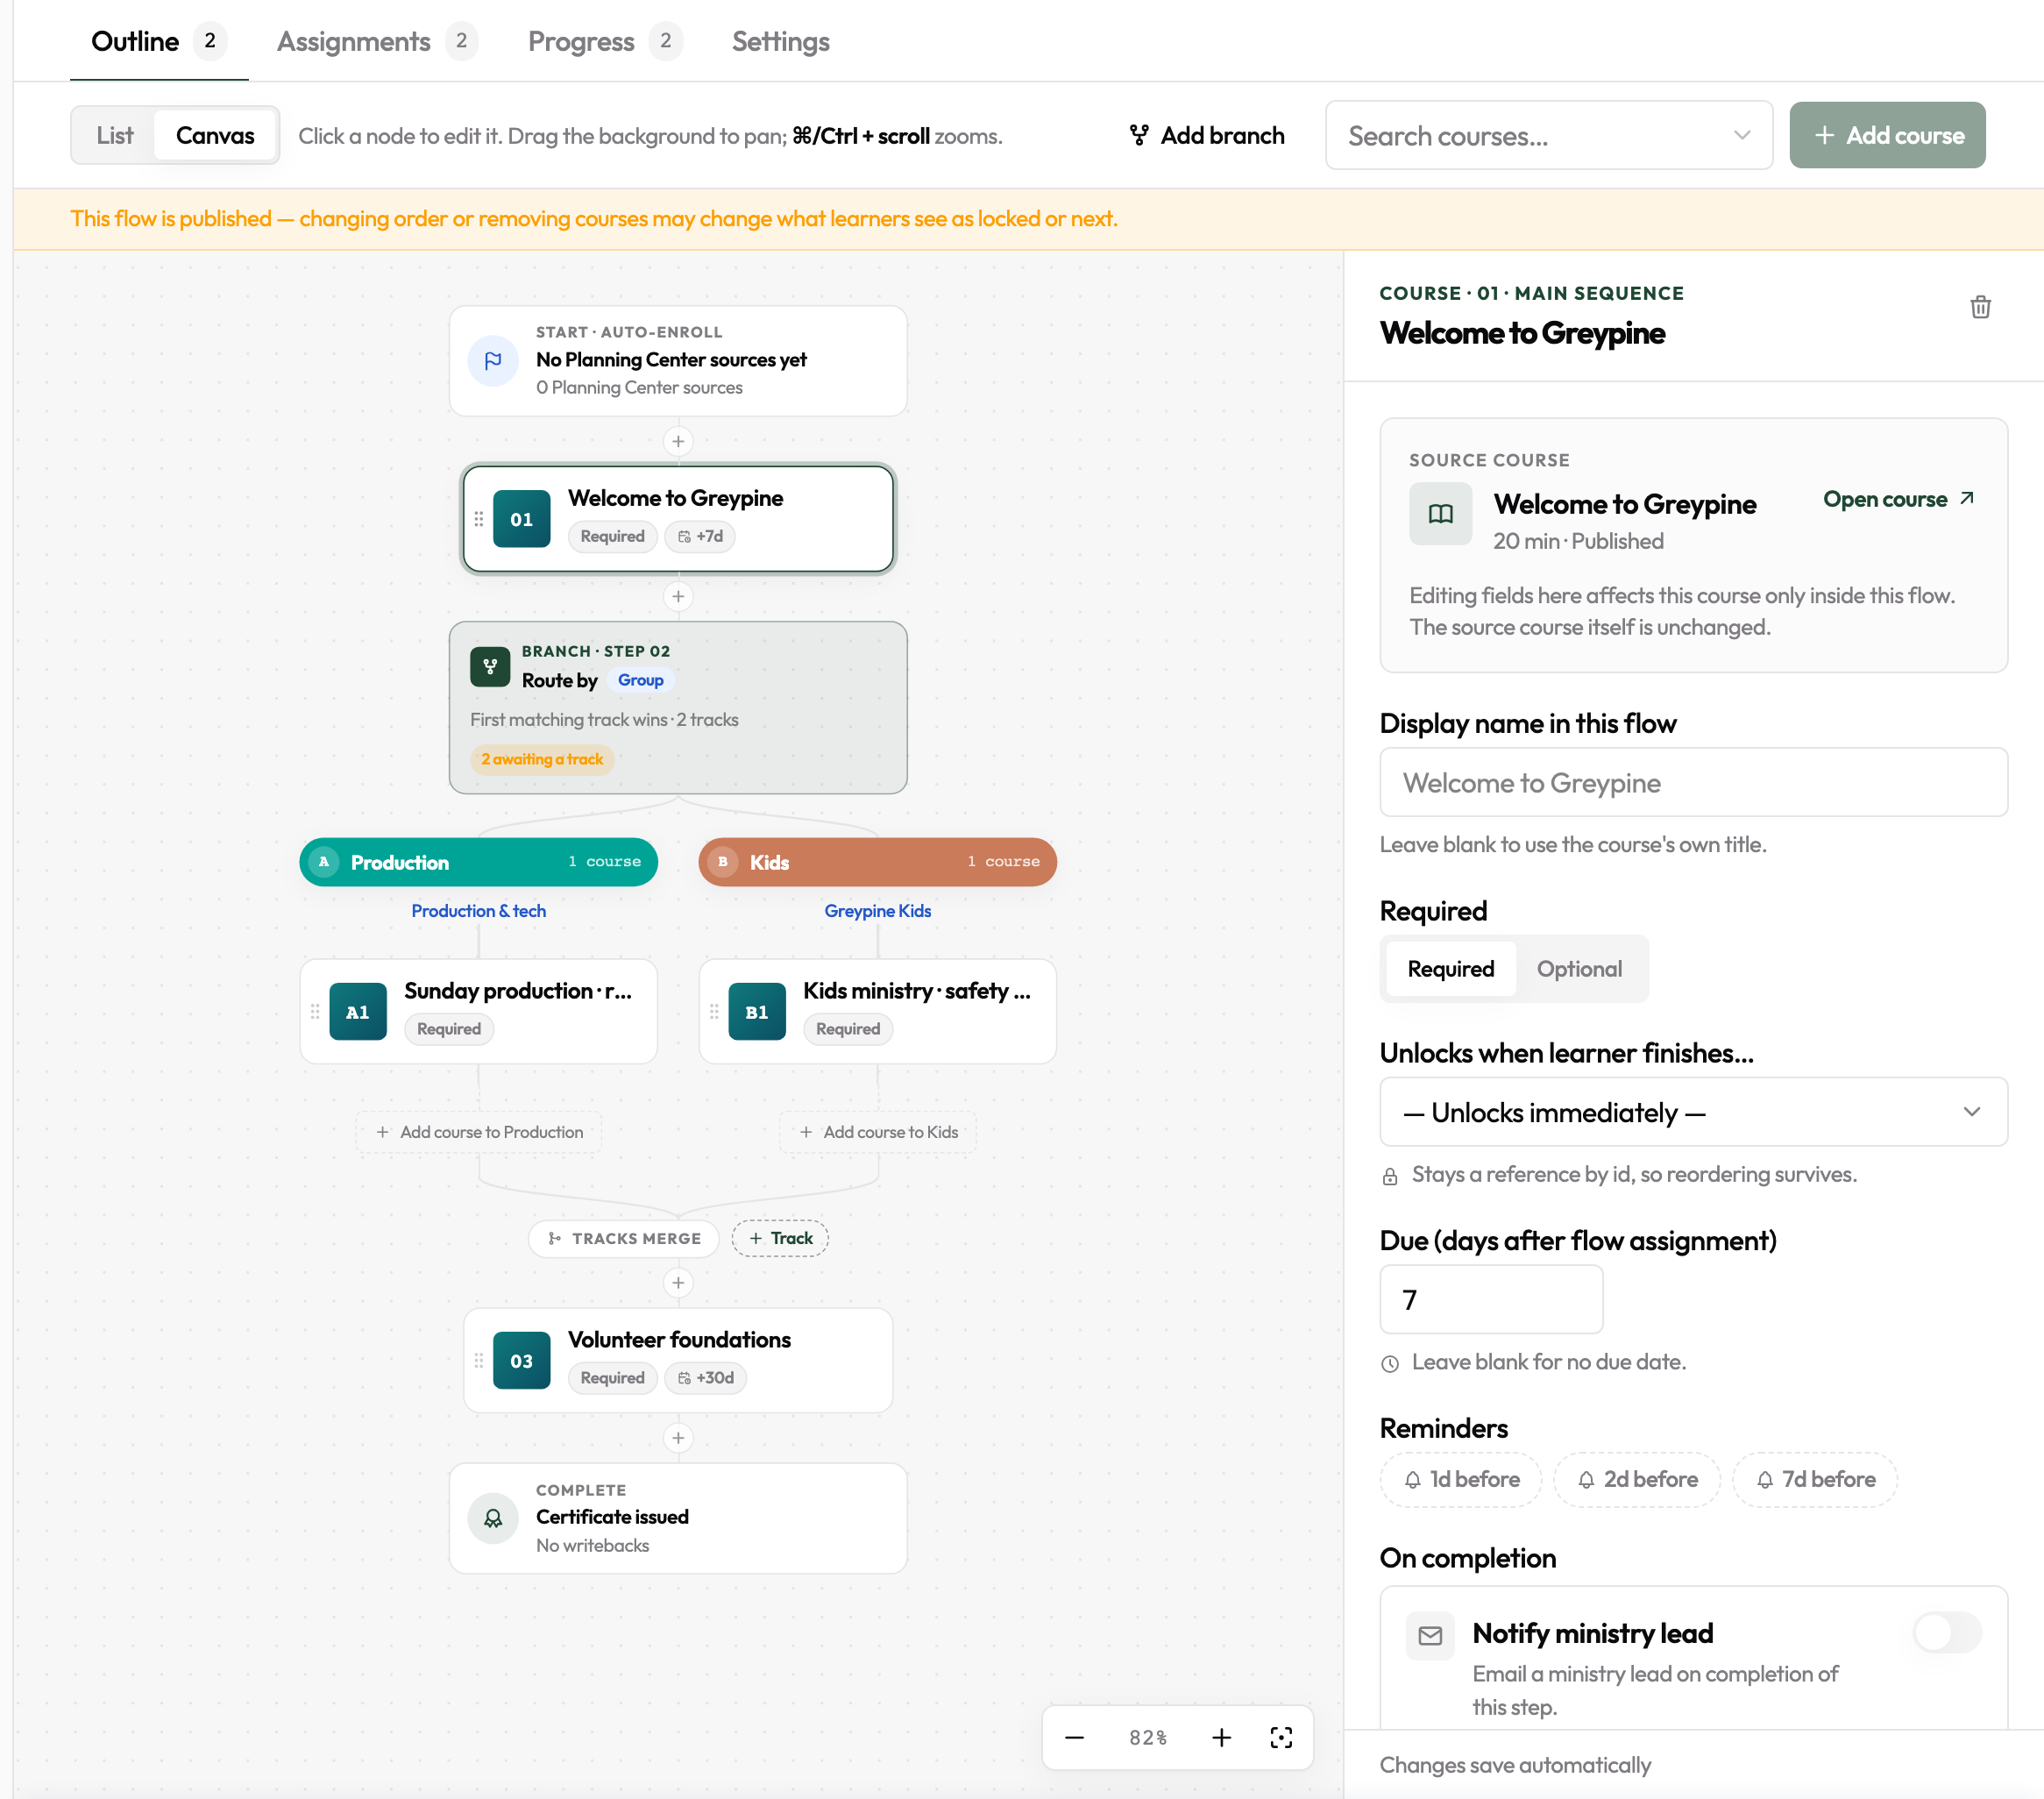
- Canvas shows your Flow as a map, from Start to Complete. Click any box to edit it in the panel on the right. This is the default on a computer.
- List shows the same steps as a simple list. It's the default on a phone or tablet.
Both views edit the same Flow, so use whichever you prefer.
Add courses
- To add a course at the end: type its name in the Search courses… box at the top, pick it, and click Add course.
- To add a course in a specific spot (Canvas): click the small + on the line between two steps, pick a course, and click Add course.
Courses come from your course library, so create the course first under Courses if it isn't there yet.
Change the order
- Drag a step by the dotted handle on its left edge.
- Or click the step and use Move up / Move down in the panel.
By default, a course unlocks once the required courses before it are finished.
Edit a step
Click a course to open its settings:
- Display name: what volunteers see in this Flow. Leave it blank to use the course's own title.
- Required / Optional: only required courses count toward finishing the Flow.
- Unlocks when learner finishes…: choose which earlier step has to be done first, or let it unlock right away.
- Due: how many days after someone is assigned the Flow this course is due. Leave it blank for no due date.
- Reminders: email reminders sent before the due date.
- Notify ministry lead: email a leader when someone finishes this step.
There's no Save button. Changes save automatically. To remove a step, click the trash icon at the top of its panel. The course itself stays in your library.
Start and Complete
The first and last boxes on the Canvas hold Flow-wide settings.
- Start (Auto-enroll): add Planning Center teams, lists, or groups. Anyone in them is enrolled automatically, including people who join later.
- Complete: what happens when someone finishes:
- Certificate: set the certificate's title and who it's signed by.
- Notify ministry lead: email a leader every time someone finishes the Flow.
- Renewal cycle: turn on Re-assign every … months for training that must be repeated, like a yearly safety refresher. Choose how often, and when to send reminder emails before it's due again.
In List view, these same settings are below the steps.
Publish and assign
- Click Preview to see the Flow the way a volunteer will.
- Click Publish. Volunteers can only see published Flows.
- Click Assign to send it to a person, a role, a Planning Center group, or a cohort.
Follow everyone's progress on the Progress tab.
Getting around the Canvas
- Move around: drag an empty part of the canvas, or scroll.
- Zoom: use the − and + buttons in the corner. On a trackpad, pinch. With a mouse, hold Ctrl (or ⌘ on a Mac) and scroll.
- Reset the view: click the recenter button next to the zoom buttons.
- Close the panel: click an empty part of the canvas, or press Esc.
Want different volunteers to take different courses? See Branches & Tracks.